Pages - Menu

Google AMP Hackathon 2017

Google AMP Hackathon

Recently got invited by Google to join their AMP Hackathon at the Sydney HQ. Very exciting opportunity to get my hands dirty with the engineers from the Google AMP team. Here are some prerequisite courses that we have to do before the day.

Hackathon

The performance of AMP is very impressive, it is not hard to see pages loaded in under 2 seconds, and here is the trade off for the speed.
  • No external JS (aka no React / Angular etc)
  • No external CSS (no bootstrap)
  • Inline CSS limit to 50kb
As we can see immediately why the site can be loaded at such lightning speed. As their engineer described, "it is very hard to make amp page to load slow".

During the hackathon, I went for a harder piece of work. I was trying to build the sorting filter in the product listing page by using amp-bind and amp-list, similar to one of this.

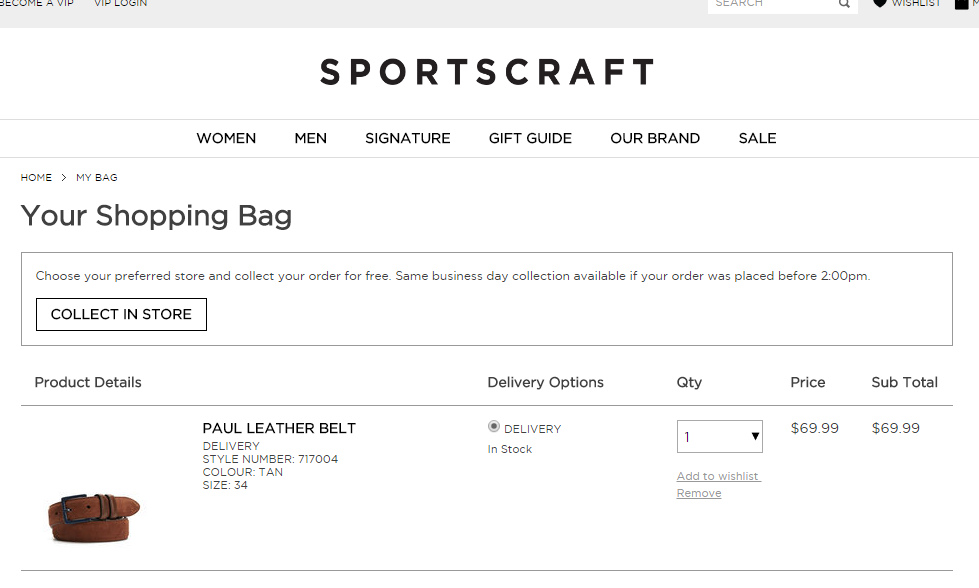
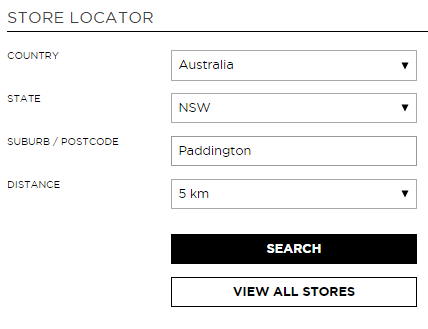
This is what a product listing page looks like on our site.


My attempt of our product listing page by using AMP.


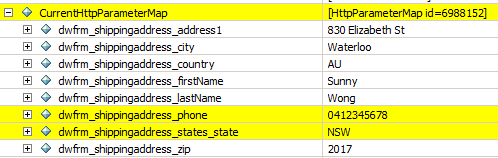
Using amp-bind and json to render the sorting options in amp-list.

<select on="change:AMP.setState({
  src: '/json/related_products'+event.value+'.json'
})">

<amp-list class="items"
  width="600"
  height="900"
  layout="responsive"
  src="/json/related_products.json"
  [src]="src">

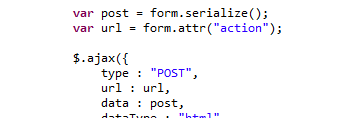
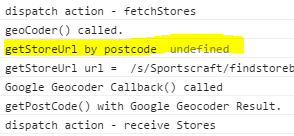
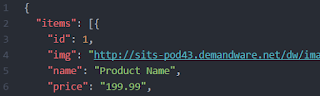
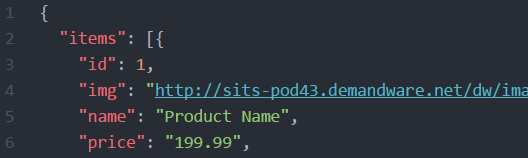
The last part is to assemble the json for the amp-list to consume and presented by amp-mustache. The json is exposed from our back end system.


PWA

In their presentations, we also briefly went over the PWA stuff. Seems like an interesting combo to use both AMP and PWA by using the amp-install-serviceworker component.

Additional Readings

Photos

Had a little guided tour in the office and snapped some photos with my mobile phone.


Corridor and lift area look like a train carriage.


Using redux-persist to Persist and Rehydrate

Scope

Our product listing page is async loaded by react ajax calls. We want to handle a 'browser back button' scenario that when the user click back, the ajax parameter will persist and the same products can be loaded on the page. A common problem when making ajax call that would change a page content after the page loaded.

Code

Setup

Install redux-persist and follow the doc to setup the enhancer.

In order to achieve what we want, we need to first persist our state somewhere, then retrieve and rehydrate the state.

Persist

As opposed to the blacklisting example, we are doing it by whitelisting.

persistStore(store, {whitelist: ['myReducer1', 'myReducer2']}, () => {
  console.log('redux-persist rehydrated')
})

Redux-persist will raise an action called 'persist/REHYDRATE' and we need to create a reducer to handle this.

import {REHYDRATE} from 'redux-persist/constants'

const reduxPersist = (state, action) => {
  if (state == undefined)
  {
    return Object.assign({}, state, null)
  }

  switch (action.type) {
    case REHYDRATE:
      if (action.payload.myReducer1 && action.payload.myReducer2) {
        return Object.assign({}, state, {
          myReducer1: action.payload.myReducer1,
          myReducer2: action.payload.myReducer1
        })
      }
      return state
  }
}
export default reduxPersist

This will persist our state in a state called reduxPersist. It is a preserved keyPrefix for the localstorage default key, so that autoRehydrate can retrieve the persisted state.

Only myReducers are persisted, others are not persisted.

Auto Rehydrate

We can rehydrate a state either by using autoRehydrate or manually doing it.

To setup autoRehydrate, we just need to add an enhancer to our store. Then our state tree is automatically rehydrated when we reload the page.

const store = createStore (
    combinedReducer, 
    undefined,
    compose(
        applyMiddleware( thunk, logger ),
        autoRehydrate()
    )
)

Manual Rehydrate

Who likes driving manual transmission these days? I do and it gives me more granular control over what I want to achieve.

To setup manual rehydrate is not as hard as it sound. We just need to pass in the reduxPersist payload in the action and utilize it in the reducer.

In the action,

return {
  type: 'UPDATE_MY_FIELDS',
  myFields: somefields,
  payload: payload
}

In the reducer,

case 'UPDATE_MY_FIELDS':
  var shouldReadCache; // some boolean custom logics
  if (shouldReadCache)
  {
    return Object.assign({}, state, {
      myFields: action.payload.myReducer1.myFields
    })
  }
  else {
    return Object.assign({}, state, {
      myFields: action.myFields
    })
  }

Conclusion

Auto rehydrate works out of the box like a charm if implemented correctly, but manual rehydrate still has its place especially for more complicated scenarios. I did not run into race conditions like other people did, but our fetch calls are usually wrapped by using the promise.

Git Ignore Conflicts During Rebase

Scenario

During a git rebase, I am getting conflicts on artifacts that I am not interested in merging.

For example, I am only interest in merging scss files but not the css, because the css is already minified and will be hard to merge via mergetool. A more sensible way is to ignore the merge and recompile the css at the end of the rebase.

Code

On a typical git rebase master, you may get some conflicts like this.


According to advanced git article, this can be achieved by using skip.

$ git rebase --skip

Git will try to do an auto-merge on the files and leave dirty files in the folder. From this point, we can recompile our css and git add them.

Conclusion

If your code base require you to check in compiled artifacts, highly recommended to do that as a separate commit. That will make your life easier on merge and rebase.


Redux Form - How to Set Checkbox Initial Value

Scope

We have a very simple requirement that wants to conditionally default the checkbox to checked for our checkout page.


Troubleshooting

Since we use react/redux, so naturally we use redux-form (currently at v6.8.0) for our form fields.

For a checkbox, our code will be like this.

<Field name={this.props.fields.addToAddressBook}
 id={this.props.fields.addToAddressBook}
 component="input"
 type="checkbox"
 checked={this.props.isAddToAddressBook}
 value={this.props.isAddToAddressBook}
 onChange={(e) => this.handleIsAddToAddressBook(e)}
/>

My state has the isAddToAddressBook: true.


However, in my console, the value is null even when the checkbox is checked.


Arguably we can use the checked field instead of the value, but Demandware doesn't allow that, so let's fix the value.

Tried a few different ways and still getting empty value.

value={this.props.isAddToAddressBook.toString()}

value={this.props.isAddToAddressBook ? 'true' : 'false'}

I also tried using defaultValue,

defaultValue={this.props.isAddToAddressBook}

it sets the defaultValue but not the value.


Solution

<input className="form-indent label-inline"
 name={this.props.fields.addToAddressBook}
 id={this.props.fields.addToAddressBook}
 type="checkbox"
 checked={this.props.isAddToAddressBook}
 value={this.props.isAddToAddressBook}
 onChange={(e) => this.handleIsAddToAddressBook(e)}
/>

Surprisingly and ironically, the solution is not to use redux-form field but normal redux binding.

Not an elegant solution if you need to write your own validation handler, but if validation is not required, this is actually cleaner. If it doesn't need to be in redux-form; then it shouldn't be in redux-form.

Reference

  • https://github.com/erikras/redux-form/issues/334
  • https://stackoverflow.com/questions/41452053/in-redux-form-how-can-i-set-the-initial-value-of-the-checked-property-of-a-chec

Setup a Tealium Tag by Data Layer and Extension

Scope

Tealium is a powerful tag management tool. Adding a tag is easy and straightforward, but things get a little complicated when I was trying to convert a tag to share between sites in our multi-tenant environment. 

I found some documentations but not examples on this topic, so I decided to make one and hope to serve well for those who maybe in need.

Steps

Tag

The simplest way to add a tag is by going to the Tags tab and click Add Tag. In this example, we are adding a Rakuten Linkshare tag with an example merchant id 12345.


Data Layer

Defining a variable in data layer is useful when we want to pass dynamic data to a tag.


Extension

In an extension, we can apply technical and business rule to assign different values to a variable, so we can share the same tag between multiple-tenant sites.

Instead of hard coding the merchant id 12345, I am now able to setup a rule to assign different ids to different sites base on different rules.


Data Mapping

Finally, we can map this variable to our tag. The destination should be the javascript query string variable name depending on the technical spec of the image tag.

<img src="http://track.linksynergy.com/ep?mid=xxxx&ord=xx&skulist=xxxx&qlist=xxx&amtlist=xxxx&cur=xxx&namelist=xxxxx">

For rakuten, it is the mid that we need.


Load Rules

Optionally, we can conditionally load the tag depending on business/technical requirements. For the rakuten tag, we only want to fire on the order confirmation page, so we will create a rule for the definition of order confirmation page.


Final Tag

Finally, the tag will look like this. Noticed now we can leave the merchant id empty, and the Tealium will do the magic by using the Data Layer and Extensions.


Migration from CSS to SASS and SMACSS

Scope

As part of our technical debt clearing exercise, we want to migrate our existing CSS to SASS and introduce a SMACSS / BEM pattern to the system. And here is my checklist.

Setup

Technical

Technically it is not a difficult exercise. SASS is backward compatible with CSS anyway. In my eyes, the difficult part is not just to get the job done but to get the job done right.

First and foremost, we changed the extensions from .css to .scss. and started compiling with compass. Previously, we did not have any lint tool for our CSS, so we picked up some syntax error or misspelling such as !impotrant, wasn't so important after all.

SMACSS and BEM

Next part is the refactoring. We opted for the SMACSS pattern because it was easy to follow and was not too much effort to implement as part of the refactoring. I would totally voted for BEM too, but it was more effort involved to change the DOM, so we left at that.

Multi Tenants

By using variables or mixins in SASS, multi-tenant projects that share the same code base or DOM elements will find that the ease of changing all base settings in one centralized _variable.scss can be very intuitive.

For example, base fonts can be changed easily without a big gun of find and replace.

$font-family-sans-serif:   'Gotham Book', Arial, Helvetica, sans-serif;
$font-family-serif:    Georgia, 'Times New Roman', serif;
$font-family-base:     $font-family-sans-serif;
And reference code will be the same across multi-tenants.
.btn { 
  font-family: $font-family-base;
}

Mobile First

We were using the older version of bootstrap and version 4 has been and still on alpha release, so we ditched bootstrap and had a fresh start using bourbon and neat.

Instead of using media queries to target mobile audience, we took the mobile-first approach and our CSS is built on mobile experience, then using media queries to target tablet and desktop where we see fit.

For example, our mobile design for the cart page looks like this. The COLLECT IN STORE button is full width and looks fine.


However, the button is too long on desktop.


We can change the styling by using media query.

@media (min-width: 768px) {
  #clickandcollect-button {
    display: inline-block;
    width: initial;
  }
}

And the width will reset to initial depending on screen width.


SCM

If you are using any SCM, you will need to ignore the .sass-cache folder. We use git so in our .gitignore, we need to add one line.

**/.sass-cache/**

Thoughts

Migrating from CSS to SASS can be value added to any type of projects. It fits both agile or waterfall teams because CSS can fallback as SASS during the compress compilation. The code will not look too ugly and still production-worthy while migration in progress.

As part of our refactoring process, we removed all the legacy !important in CSS which was very !important for me!

Demandware - Migration from jQuery to React

Running React only. jQuery is not defined

Scope

Our production website was using an uncompressed and unminified 7000+ lines of jQuery file that do a lot of DOM manipulation.The site was slow and a lot of overhead with the javascript.

We recently migrated our site from jQuery to React with the following goals in mind.
  • Reduce file size
  • Improve on load speed
  • DOM rendering time
  • Improve readability and maintainability of the code

7000+ lines of jQuery

React vs Angular

Perhaps one of the hardest decision I have to make is to choose between React and Angular. There are already many great articles talked about this topic and this is one of them.

The two technologies are pretty much head to head. My reason for React over Angular was more a cultural than technical reason.

Technical

Technology Stack

  • Demandware
  • React / Redux / Thunk / React Habitat
  • ES6
  • Webpack

Non-SPA

React is designed for Single Page Application, but our site is not. The complexity and integrity of an e-commerce site do not marry well with the SPA architecture.

For a non-SPA site using the React framework, javascript will throw exception if a component is not found. A SPA site will not have this issue because all components are available on the single page.

To overcome this problem, we are using the React Habitat Redux. In a nutshell, it is a layer that will help "hiding" components that are not needed for the page, thus no error for components not found.

On a typical Demandware isml page, our source code will look like this.

<isscript>
 var data = {
  "link": URLUtils.url('Cart-Show').toString(),
  "message": Resource.msg('global.notification.addtobag', 'locale', null)
 }
 var dataJson = JSON.stringify(data);
</isscript>

<div data-component="Notification_Container" data-prop-data="${dataJson}"></div>

In react, we will render our html by using this.props.

render () {
 return (
  <div className="notification-wrapper">
   <div className="message">
    {this.props.data.message}
   </div>
   <div className="action">
    <a href={this.props.data.link}>View Bag</a>
   </div>
  </div> 
 )
}

Dev tools

3rd party components

The fun part of using React is to explore 3rd party (open source) components for your need. Here is a list of some of the more important ones.

IE 10, IE 11 and Safari

Some of the ES6 commands are not supported by IE 11 and Safari. We added some polyfill to our webpack and conveniently it also works for IE 10.

IE 8 and IE 9

\@_@/

IE < 8

|Orz

Firefox

In developments, we found some of the components were not rendering in Firefox. Issues were intermittent and happening about 1 out of 10 times on a page with more data.

We webpack our js in production mode and the problem has gone away since.

Demandware Content Assets

Content assets were converted in a similar manner to other isml pages but in a better way. There are no more ad-hoc includes for random jQuery plugins. Rather, we write dedicated components to handle and support features that we want to make available to content assets.

All of these are bundled in one single bundle.js file so we can leverage client-side browser cache for performance gain.

In our content asset, we select HTML type and simply include the <div> container.

<script>
var json = {
 cid: 'my-content-asset-id',
 items: [
  {
   title: 'Do I need to be home for my delivery?',
   html: '<p>Some answers to the question...</p>'
  },
  {
   title: 'I have a Missing / Lost Order',
   html: '<p>Some more answers to another question...</p>',
  }
 ]
}
</script>

<div data-component="Your_Container_Name" data-r-prop-fields="json"></div>

Similar to what we previously done to isml, but we will use javascript json to hold all the properties by using React Habitat data-r-prop. Notice the difference in using <script> instead of <isscript> as it is not a Demandware script.

Demandware Content Slots

Content slot in Demandware is a small widget that is time-based and user segmented. For HTML type, we convert the HTML similar to content asset. For other types, they will just work fine.


One Page Checkout

Last year, we have done a Demandware - Converting Multi-steps Checkout to One Page Checkout. To convert this to React, we simply replace our jQuery.ajax() by React component with Fetch.

Google Geocoder

We use Geocoder in our store locator to display a google map for our stores. During our development, we found a race condition that sometimes the Geocoder callback is returning too late and the DOM is already re-rendered, so we wrote our own GeocoderPromise that wrapped the Google Geocoder in Promise object. 

Tealium

Some of our tags were firing off on DOM ready event, which is now lazy loading in React. We had to implement our own redux-tealium to help manually triggering tags.

Thoughts

There were a few stress points during the migration.
  • Learning curve of new technology
  • Lack of learning materials about Demandware React integration. Almost no one has done it before if asking around in Demandware XChange.
  • Using Demandware in non-SPA architecture
  • Overly complicated to do something simple (eg. show/hide elements or popup modal written in React)
Was it worth the effort? Definitely.
  • Code is now more readable and maintainable
  • Some of our jQuery plugins are overdue for updates (which we don't need to do anymore)
  • Reducing number of jQuery plugins into a handful of React components
  • No more random jQuery events firing off because hidden code buried deep somewhere
  • Significant overall performance gain


Demandware - Ajax Fetch Form Post in React

Scope

Previously, we did a mini project for Demandware - Converting Multi-steps Checkout to One Page Checkout

Ajax post was done by using jQuery as that is the standard javascript framework in Demandware. As we are migrating from jQuery to React, we no longer have the luxury to use $.ajax().


Technical

In our ES6/Javascript, we will use fetch to perform our form post. In React/Redux, we will do this in our action.

By not using jQuery framework, we also no longer be able to use the .serialize() to serialize the Form object. This will need to be done by Vanilla JS and I have found a library just do exactly that. :)

Code


import serialize from 'form-serialize'

export const postFormAjax = (actionUrl) => {
 
 var myForm = document.getElementById('my-form')
 var data = serialize(myForm)
 
 return dispatch => {
 
  var init = {
   credentials: 'same-origin',
   method: 'POST',
   headers: { 'Content-Type': 'application/x-www-form-urlencoded' },
   body: data
  }

  return fetch(actionUrl, init)
   .then(response => console.log(response))
 }
}

Note

  • In the above code, I passed in the actionUrl to my javascript from my Demandware isml by URLUtils.continueURL().toString().
  • We need to manually set the content-type header, otherwise pdict.CurrentHttpParameterMap will be empty.
  • I was trying to use FormData, but I couldn't get it to work with latest Chrome and Demandware. I ended up with bunch of WebKitFormBoundary string that was not usable.


Result

I implemented the above in React and I am able to parse form data correctly in Demandware.


In our checkout page, I can dispatch actions to disable/enable the correct panels while performing ajax post back in the background.


Fetch then Promise by Google Geocoder Example

Scope

Our store locator supports searching by post code or suburb names.


However, our Demandware instance only have stores information by post code. In order to retrieve store information by suburbs, firstly we make an ajax call to the Google Maps Geocoding API to find out the post code by suburb. Then, use this information to search for stores.

All of the above are javascript driven by React dispatches. In our console log, we found that the code is fetching the getStoreUrl before the Google API callback our site which is incorrect. The timeline looks like this.


Technical

The Goal: After we called geoCoder(), we need to wait for Google API callback() before calling getStoreUrl().

To achieve this, we will wrap the Google API call within a Promise object. For simplicity, I stripped out some of our custom logic and our code looks like this.

export const geoCoderPromise = (address) => {
 console.log ('geoCoderPromise() called.')
 
 var geocoder = new google.maps.Geocoder();
 
 return new Promise(function(resolve, reject) {
  
   geocoder.geocode({'address': address}, function(results, status) {
      console.log ('geoCoderPromise Callback() called', results)
      
      if (status == google.maps.GeocoderStatus.OK && results[0]) {
       resolve(results[0]);
      } else {
       reject(status);
      }
   })
 })
}

We use 'then' to chain up the Promise objects chronologically.

export export const fetchStores = () => {
  console.log('dispatch action - fetchStores')
   
  return dispatch => {
    return geoCoderPromise(address)
      .then(result => fetch(getStoreUrl(result)))
      .then(response => console.log(response.text()))
  }
}

Looking at the console log, the execution sequence is now correct. Firstly we ask Google what is the post code for Paddington, then we past 2021 as a parameter to our getStoreUrl to generate the url and then dispatch a fetch().


Coding JSX in Eclipse

Setup Eclipse for JSX


We use Eclipse in our dev environment because that's officially what our Demandware UX Studio supports. As we migrate our jQuery to React.js, coding JSX in Eclipse required a few setup.


Associate *.jsx to the JavaScript Editor as 'default' editor.


Associate the content type to the file type.


Bonus: Webpack

We use webpack to package our file and running Eclipse in the background to automatically upload our cartridge to our Demandware sandbox. In order for Eclipse to detect a change and trigger an upload automatically, there is one more setting we need to change - Refresh using native hooks or polling.

Coding in JSX - How to Comment and if-else statement

Coding in JSX

Dealing with JSX is almost vanilla-html-like but sometimes still a little tricky, so I documented the 2 that I have encountered while I was working with React and JSX.

How to Comment in JSX

I was trying to comment out some of the html inside my jsx and it looked weird and didn't render properly.

render() {
  return (
    <div>
      <div>Hello World<div>
      <!-- This doesn't work! 
        <div>Hidden note</div>
        -->
    <div>
  )
}

What I really needed is this. A 'java' style rather than 'html' style.

render() {
  return (
    <div>
      <div>Hello World<div>
        {/* My Comments...
          <div>Hidden note</div>
          */}
    <div>
  )
}

if-else in JSX

render() {
  return (
    <div>
      <div>Hello World<div>
      { if true }
        <div>true</div>
      { else }
        <div>false</div>
    <div>
  )
}

A normal if else statement cannot be compiled. However, jsx accepts shorthand notation

render() {
  return (
    <div>
      <div>Hello World<div>
      { true ? <div>true</div> : <div>false</div> }
    <div>
  )
}

Getting Started with Git 101

Scope

I have used many SCM in the past. VSS, SVN, TFS, ClearCase, Mercurial etc... There are so many of them yet they are so similar, so that they are not even worthy for a spot in a resume.

However, git was a little more challenging to me as their structures and architectures are different. I have now used git for just over a year now, and put the followings together that covered what I believe is a good starting point to learn git commands.

Technical

Config

I use posh-git and found the default dark red color was a bit hard to read against a dark background color in Windows console. I changed them to yellow and magenta by updating the ~/.git/config.

[color]
    ui = true 
[color "status"]
    changed = magenta bold
    untracked = yellow bold

Settings

# Change a global setting
$ git config --global --edit

# Change editor to notepad globally
$ git config --global core.editor notepad

# Setup git diff / merge tool globally
# for example, if we are using p4merge as a diff / merge tool.
$ git config --global diff.tool p4merge
$ git config --global merge.tool p4merge

# Git merge generates unwanted .orig file
$ git config --global mergetool.keepBackup false

Basic Changes

# Check pending check-in status
$ git status

# Get latest files
$ git pull

# Change branch
$ git checkout <branchName>

# Add files for pending check in
$ git add <filename>

# Undo a git add
$ git reset <filename>

# Delete files for pending check in
$ git rm <filename>

# Undo pending delete files 
$ git reset head <filename>

# Amend last commit
$ git commit --amend

# Undo commit
# This will reset the the branch to a previous commit 
$ git reset HEAD~

# Hard reset is a potentially dangerous command
# Changes are destructive and may not be recovered
$ git reset --hard <commit-id>

# a force push will force the origin to point to the same commit as local
$ git push origin HEAD --force

# Discard changes in working directory
$ git checkout <filename>

# Discard untracked files in working directory
# Double check what to delete
$ git clean -f -n

# The actual deleting
$ git clean -f 

# Discard untracked folders in working directory
$ git clean -df 

Stash


It is similar to shelve in TFS.

# All unstaged and staged dirty files will be "stashed", 
# and the working directory will be cleaned.
$ git stash

# shows the list of stash
$ git stash list

# shows content of stash
$ git stash show -p

# retrieve then remove changes from the stash 
$ git stash pop

# apply changes (and not removing) from the stash
$ git stash apply

# remove changes from the stash
$ git stash drop

# remove all stash history
$ git stash clear

Branch

# Delete a local branch
$ git branch -d <branchName>

# Delete a remote branch
$ git push origin --delete <branchName>

# Rename current branch
$ git branch -m <newname>

Merge

# Merge a branch from source to destination
$ git checkout destination-branch
$ git merge source-branch

# Resolve a merge conflict
$ git mergetool

# Resolve merge conflict with theirs or ours preference during a conflicted state.
# Take their changes
$ git checkout --theirs *
$ git add *

# Take our changes
$ git checkout --ours *
$ git add *

Tag


# listing tags
$ git tag
  
# add tag
$ git tag -a <tagName> -m "A message for tagging"
  
# push local tags to remote
$ git push origin --tags

# branch out from a tag
$ git checkout -b <newBranchName> <fromTag>

Rebase

# Rebase branch from parent branch
$ git rebase <parentBranch>

# Conflict during rebase
$ git rebase --[abort|skip|continue]

Fork and Submodule

# Add a remote repo to current repo as a subfolder
$ git submodule add <gitRepo>
  
# Get latest in submodule
$ git submodule update

Demandware - Bazaarvoice Cartridge Decoupling by Using Tealium and Commerce Connect

Scope

We are implementing a Bazaarvoice integration with our Demandware ecommerce platform. For general Demandware customers, that require installing and configuring the Demandware Bazaarvoice Cartridge from the Demandware Marketplace.

For us, we are slightly ahead in our game plan and we can do something a bit more advance. We use Tealium for our tag managment and Commerce Connect for our feed integration. Therefore, we can put our Bazaarvoice beacons in Tealium, and our product feed from Commerce Connect. Then our Demandware implementation became a simpler implementation with just the review containers and the submission isml template.

Technical

In a nutshell, we are implementing a bunch of Bazaarvoice products and we distributed some of the responsibilities to other products depending on what is required.


The general idea of the above is to leave the html changes in Demandware, put all javascripts in Tealium, and create feed jobs that run from CommerceConnect.

SEO is implemented within the Demandware cartridge.

Product Catalog Feed is moved to Commerce Connect - The same platform that we use to manage our eBay or Google feed. We can setup a new channel with the Bazaarvoice type.


Question and Answer / Ratings and Review are split into both Demandware and Tealium. The bvapi.js tag will go to Tealium, but we need to implement the html containers or initialize the inline ratings in Demandware.

ROI Beacon is basically a javascript call to do $BV.SI.trackTransactionPageView(). This is achieved via Tealium.

For Submission form, this is a piece of stand alone Bazaarvoice component for customer to submit reviews, so I leave everything in Demandware including the javascript. It is implemented in the Demandware cartridge as Bazaarvoice-Container pipeline.

We also made some UI changes to include our company header in the container. Container URL is done via Config Hub.


Conclusion

There were a few hurdles during this process, but as our ecommerce system grow and integrate with many vendors, it is essential to setup all this foundation correctly.

By decoupling some of the job responsibilities to other vendors, our ecommerce system can focus on strategy and planning, while leveraging our vendors to help us managing our tags, product feeds or product reviews.