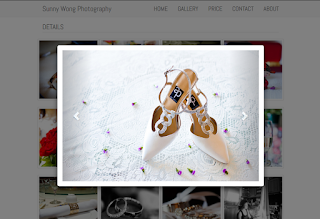
Pages - Menu

Demandware - How to replicate from PIG to SIG

Scope

Typical scenario where we want to bring down a staging instance from Primary Instance Group (PIG) to one of our sandbox so we have up-to-date contents in our Secondary Instance Group (SIG). By default, Demandware does not have this functionalities and cannot be done out of the box.

Solution

One easy way to achieve this is by doing this.

  1. Go to Business Manager in PIG
  2. Administration >  Site Development >  Site Import & Export
  3. Export site and Save in Global Export Directory
  4. Optionally run dbinit in SIG via Control Center
  5. Go to Business Manager in SIG
  6. Administration >  Site Development >  Site Import & Export
  7. In the Import panel, the site backup will be available as global location.


Bitbucket Continuous Integration with Bitbucket Pipelines

Scope

We use Bitbucket as our SCM and other few Atlassian products in our development team. Happy to say that I am pleased with the tools that it made our daily works very productive and hassle free. 

Recently, I am looking into a CICD solution for our deployment process. I have already previously Setting Up Jenkins for GitHubSetting Up Octopus Deploy for Jenkins with nopCommerce Projects or Setup Continuous Integration with Visual Studio Online. I like the design of Octopus Deploy, but given we are now happily living with our Atlassian suite, I want to see what the Bitbucket Pipelines (formerly Bamboo) can offer me. 

I just signed up for the Bitbucket Pipelines Beta and already received the beta invitation within about 6 hours :)


Goal

  • Setup and integrate Bamboo with Bitbucket.
  • Explore possibility to automatically run the Demandware Grunt Build Suite when we commit to master.

Setup

I clicked the link to install the Bitbucket Pipelines add-on.
Went through a simple setup procedure and enabled it in my repository.


It adds a Pipelines link in my repository.

Going through the wiki to configure the bitbucket-pipelines yml.

It is essential to understand the Docker Image used by Bitbucket pipelines. The default image uses ubuntu and is good enough in our scenario.

In the setting tab, we are able to setup environment variables for username and password.


We created a bitbucket-pipelines.yml script in the root folder.


Check-ins to the master will trigger the Bamboo to run the build job and script.


Thoughts

I have not had much chance to explore further, but it looks quite promising and does what I wanted. I like the fact that it is tightly integrated with our bitbucket so I do not need to login to another service, the setup was simple and straightforward.

"Build servers build" - Bitbucket Pipeline is a CI server and not a CICD server. We will leverage Bitbucket Pipelines for our continuous integration and our Demandware Business Manager for deployment purpose. I am pleased with the Bamboo Pipelines, this should work well and fits in our CICD strategy.


Demandware - Implementing 3rd party FTP Service for XML Drop

Scope

I developed a few Demandware cartridges that export xml via ftp for 3rd party integration. A few things that I have done such as:-


  • Piggy back a ftp drop task to the current job schedule that imports xml from a difference integration point
  • Using standard Demandware pipelet to generate a xml feed for ftp drop
  • Create a custom script node to generate a xml feed for ftp drop
It wasn't too difficult as a job, but I found a few hidden gotchas that I believe are noteworthy.


We are dealing with the latest Demandware version 16.7.

Technical

FTP Constraints

  • Ftp connection is established using passive transfer mode (PASV) only.
  • Demandware only support ftp and sftp for backend integration, no ftps.
  • Use FTPClient for ftp; and SFTPClient for sftp.

ArrayList

In our code, we use dw.util.ArrayList to filter out products for export. We ran into an error where the ArrayList cannot be bigger than 20,000 in size.

Front End Debugging

I was testing out a pipeline-startnode by direct url from a broswer, it did not turn out well because some of the pipelets can only be executed from the backend. The error message looks like this.

com.demandware.core.quota.QuotaExceededException:
Limit for quota 'api.pipelet.ImportExport' exceeded. Limit is 0, actual is 1.

Job Schedule

We tried to schedule a job for our cartridge and learnt in a hard way that JS Controller is not supported for Business Manager Job Schedule. Only pipeplines can be used.

Traversing XML

If you happened in need of traversaing the xml, Demandware uses ECMA scripts for XML. Here is a quick start guide.

Firewall

Besides the firewall rules that I needed to manage with our external vendor, we also need to request outbound firewall rule from Demandware.

As they pointed out in their doc, "Before you can make an outbound FTP connection, the FTP server IP address must be enabled for outbound traffic at the Demandware firewall for your POD. Please file a support request to request a new firewall rule".

From Demandware, there are steps to request a Firewall rule to allow outgoing connections to 3rd party services.

Demandware - Monogram by using Product Options

Scenario

Our business wants to start selling personalized product by monogramming. In this particular promotion, customer gets a free monogrammed luggage tag when they buy a bag.

Technical

In Demandware, this can be achieved by using Product Options. This is the recommended way to deal with monogram in Demandware. As they stated in their document, "product options enable you to sell configurable products that have optional accessories, upgrades...".

We can set up product options by going into Business Manager. Merchant Tools -> Products and Catalogs -> Product Options.

Create a New Option and put in relevant details.


In our scenario, we have allowed up to 3 initials for our monogram. Due to Demandware limitations and our UI design, we decided to store the values in 3 different product options. Each option stores A-Z and a blank, it can vary base on your technical and UI requirement.


We will then create the System Object Attribute to store the Product Options.

In Administration -> Site Development -> System Object Types, we will add new attributes for Product.


Result

Monogramming options can be set at per color level. Therefore, in our product detail page, we are now able to sell our chocolate color bag with monogramming options but not our black color bag.


And the monogram information is available in our mini cart, cart, checkout and all the way through to our order summary page, as well as the order confirmation email that we sent to our customers.

Conclusion

There were a few discussions, considerations and research done within our team when we were planning for the monogram features for our products. Once we read enough Demandware documentations, and with a few try and error in our sandbox, we got our solution. We are happy with this implementations because it uses the native Demandware features rather than putting custom code in our cartridge.

Demandware - Get Active and Upcoming Promotions

Scope

We are trying to get a collection of promotions that are either active or upcoming. We want to pre-calculate all our promotional price in advance for our affiliate feeds, so they will get the most updated price without frequent feeds from us.

At the time of writing, we are using the latest DemandWare 16.7 API.

Technical

In the DemandWare API, there is no such thing about getting active and upcoming promotions. Ideally we would like to return a collection combining the following.

PromotionMgr.getActivePromotions();
PromotionMgr.getUpcomingPromotions(1000);

Since these 2 methods return an object PromotionPlan and there is no supporting methods such as promotionPlanA.Add(promotionPlanB), so we will need to write a bit more code to achieve what we want.

function getActiveAndUpcomingPromotions() : Collection
{
 var promos = PromotionMgr.getPromotions().iterator();
 
 var result : ArrayList = new ArrayList();
 var now : Date = new Date();
 
 while (promos.hasNext())
 {
  var promo = promos.next();
  
  if (promo.active 
  || (promo.startDate != null 
    && promo.startDate > now 
    && (promo.endDate == null || promo.endDate > now)))
  {
   result.push(promo);
  }
 }
 
 return result;
}

Notes

  • Depending on number of promotions in the system, this can be an expensive operation to loop through all the promotions, so it is recommended to use local caching for the collection.
  • Our custom code is better than the original PromotionMgr.getUpcomingPromotions(previewTime : Number) because it was not possible to retrieve ALL future promotions where the previewTime is compulsory.
  • Our custom code only return Collection of Promotion, this is not the same as a PromotionPlan.
  • Beware of the ArraySize Limit 20,000 in DemandWare. Pushing more than 20,000 active promotions to the array will throw exception.

Demandware - Pipeline or start node can't be found.

Scenario

I created a new cartridge called int_fusion_factory. When I tried to run the Pipeline-Start Node pair with a Job Schedule, I am getting the Pipeline or start node can't be found error.


Solution

In Business Manager -> Administration -> Sites -> Manage Sites, there are separated effective cartridge path settings for Business Manager.


We need to add our new cartridge to the Business Manager Path.


Git - How to Handle Emergency Deploy to Live Environment

Master always have our latest changes in our development and could be dirty and not production worthy. In order for us to do an emergency stable deploy to our live environment, it can be achieved as follow.


  1. Suppose we have our Master M. On our last well known tag called mytag deployed to our live environment.
  2. Subsequently C1 and C2 changes are commited to our Master.
  3. And, we have an emergency deployment required for C3 change that needs to be pushed to live with out C1 and C2.
This can be achieved by the following.


# branch out to master-e from mytag
$ git checkout -b master-e mytag

# After committing change C3 to our new branch, we are then good for live deployment.
# Last thing to do is to apply C3 to Master Origin, so that our next deploy will have C3
# This can be achieved by a simple merge.
$ git checkout master
$ git merge master-e

The new branch master-e is then kept until the next master deploy, if we need other emergency deploys before our next master deploy, we can reuse master-e.

Demandware - Converting Multi-steps Checkout to One Page Checkout

Overview

Recently, we had a mini project to replace our multi-step checkout page into a new one-page checkout.

Our last checkout process consist of 4 steps. After items are added to the bag, the checkout process as follow.
  1. Login or Checkout as Guest
  2. Shipping
  3. Billing
  4. Confirm 


As observed, it is clunky and takes a lot of reading, typing and waiting before one can reach to the end and place an order. In our new design of one page checkout, we optimized all our intermittent calls in ajax so that the overall user experience is smoother. Using only one page to taking care of what we previously can only be achieved by using 4 checkout screens.


Challenges

There were a few challenges and stress points in this project. 
  • The consequence of breaking a check out page is high.
  • Not many people have done an one page checkout in Demandware.
  • I was getting a lot of 500 internal errors thrown within Demandware and there were no logging or error messages available
  • Debugger tools doesn't stop at break points when 500 error thrown.
  • Our team is relatively new in Demandware.
  • And I am relatively new in Demandware too.

Technical Overview

Pipeline


We created a new pipeline to handle our new checkout. Some of the intermittent calls are either reusing existing pipelines or newly created.


Firstly and noticeably in our new pipeline, that the end journey is no longer an Interaction Continue Node nor Jump Node. It is replaced by an Interaction Node. This is because in our isml template, we use a bunch of <iscomponent> to do dynamic include of different checkout steps onto the one page, and these pages will have their own ajax post back.

While we are consolidating our new checkout process, we are also trying not to lose any existing functionalities. For example in our Start Node, we will call the old checkout pipelines like COCustomer-PrepareCheckout to make sure our form is prepared for the checkout process like we used to, then we will call our customized OPCheckout-PrepareCheckout pipeline for any extra functionalities. The pdicts are also updated as we post back our form.

SCM


There were about 120 files changed in our source code. We only created one file for our new pipeline, but still many new files due to template and css changes. We also retrospectively changed some of the exit points in some of our existing call nodes, they are now returning a proper error end node to the calling pipeline, so that all the jump nodes are now managed in one main pipeline only. No more yelling and screaming why an user redirected to an unexpected jump node again. :)

Conclusion

Our conversion rate slightly increased and our checkout funnel drop rate also moderately decreased. Although we have not yet received enough data sampling to conclude anything at this stage, but we are very confident and positive with the new checkout. And, we already receiving some good feed backs from people about the new UX design, and that's winning!!

2017 Updates

Just a quick update on my old post, this one page checkout project has led to more than 10% increase in conversion rate. This is equivalent to more than $1M increase for a business with $10M turnover.

Migrating a Website from Bootstrap 2.x to 3.x with SASS and AngularJS

 Scope

My photography website was developed by using Bootstrap 2.x. Here are some technical details about my site.
  • A small website with less than 10 HTML pages.
  • Hosted on AWS S3 with static content only.
  • Since it is on S3, there are no backend languages allowed. C# or php are off the limit.
  • Contact Us form is a 3rd party service iframed somewhere else.

I was quite happy with it for several reasons.
  • Responsiveness.
  • Simple and efficient with no backend developments.
  • Extremely cheap and fast with AWS S3.
  • Does the job well for my purpose. 
  • UX score of 100 by Google PageSpeed Insight


Unfortunately, it has some downsides though.
  • There are no one header and footer file for the site. Therefore, a lot of copy and paste to do between pages just for the same piece of code. 
  • The hover status of the nav bar is hardcoded. :(
  • CSS and JS are not optimized.
Recently my designer did a makeover design for my site as she described my site as "dull and boring" :) I thought I might as well upgrade my site to a newer version of Bootstrap as it is more mobile friendly..

Bootstrap

Firstly, we will download our Bootstrap source and extract to our local folder.


According to the spec, I could just use the Bootstrap distribution version for my purpose, but as a developer, I wanted to see what's in the goody bag by getting my hands dirty.

As Bootstrap 4 is moving from Less to Sass, so I've decided to go with the Sass port for a comfort of future compatibility. It is currently at v3.3.5, so this is what we are going with.

Sass (Syntactically Awesome StyleSheets)

Setup

Firstly, we need to install Ruby. Then we will use Gem to install the sass package.

$ gem install sass

Now we will be able to use Sass to compile our css. There are many ways in using Sass.

And a more advanced approach will be using the Compass.

$ gem install compass
$ cd $/bootstrap.sass/assets
$ compass init

After we run these commands, it will install the compass and initialize a compass config file with some stub css files. A message in the console would look like this.


In order to work with the Bootstrap structure, I moved the stub files from $/sass to $/stylesheets, and changed the path as follow.

http_path = "/"
css_dir = "css"
sass_dir = "stylesheets"
images_dir = "images"
javascripts_dir = "javascripts"

Compass commands are quite straight forward. The following command will compile the sass files manually.

$ compass compile

We can also use the watch command to recompile automatically when there are changes made to the the sass files.

$ compass watch


Minification

To minify the css files, we can add a compressed switch in the compile command.

$ compass compile -s compressed

Or we can change the default setting in the config.rb file.

output_style = :compressed

I have also created a callback function that will generate different files for development and production environment by passing in a different switch.

In my config.rb, I will set my output style depending on the environment, and we will append the .min naming convention when compressing.

output_style = (environment == :production) ? :compressed : :expanded

on_stylesheet_saved do |file|
 if File.exists?(file) && (output_style == :compressed)
  filename = File.basename(file, File.extname(file))
  FileUtils.mv(file, css_dir + "/" + filename + ".min" + File.extname(file))
  puts "   minify " + css_dir + "/" + filename + ".min" + File.extname(file)
 end
end

We can now control what to output by switching between development (default) and production.

Map File

In order to generate the map files, it can be done via a switch.

compass compile --sourcemap

Or in my config.rb.

sourcemap = (environment == :production)

CSS Vendor Prefixes

In order to deal with the CSS Vendor Prefixes, and because we chose not to use the Gruntfile from bootstrap, we need to integrate our own Autoprefixer.

By following the Autoprefixer Rails guide, we will install the gem.

$ gem install autoprefixer-rails

And we will add a callback in our compass config.rb as follow.

require 'autoprefixer-rails'

on_stylesheet_saved do |file|
  css = File.read(file)
  map = file + '.map'

  if File.exists? map
    result = AutoprefixerRails.process(css,
      from: file,
      to:   file,
      map:  { prev: File.read(map), inline: false })
    File.open(file, 'w') { |io| io << result.css }
    File.open(map,  'w') { |io| io << result.map }
  else
    File.open(file, 'w') { |io| io << AutoprefixerRails.process(css) }
  end
end

Testing it by creating a new test.sass as follow.

a {
    display: flex;
}

After we compile, we now have a vendor prefix css generated.

/* line 1, ../stylesheets/test.scss */
a {
  display: -webkit-box;
  display: -webkit-flex;
  display: -ms-flexbox;
  display: flex;
}

Compile

In our screen.scss (generated by compass init), we will add this line. This will import the partial bootstrap scss to our screen.scss. We can add our custom scss in this file later on.

@import "bootstrap";

Migration

There are comprehensive migration guide done by the Bootstrap team. There are also conversion tool available that will do the boring part of the find and replace job.

AngularJS

I am also ditching the default bootstrap jquery and using AngularJS. It is just a nicer way for me to manage header and footer without using any backend language like C# or php.

This can be achieved by using UI Bootstrap if done correctly.

I need to make some small changes in our html to remove the default bootstrap / jquery js and include angular and ui bootstrap js.

<!-- include angular js -->
<script src="js/angular.min.js"></script>

<!-- include ui bootstrap -->
<script src="js/ui-bootstrap-tpls-1.3.1.min.js"></script>

<!-- remove jquery and bootstrap js -->
<script src="js/jquery-1.9.1.min.js"></script>
<script src="js/bootstrap.min.js"></script> 

Now I am able to use ng-include to add header and footer.

<div ng-include = "'_header.html'"></div>

Also, an angular based carousel that can render my image gallery.

<div id="carousel">
    <uib-carousel active="active">
      <uib-slide ng-repeat="f in selected.files track by f" index="f">
        <img ng-src="img/{{ selected.folder }}/{{ f }}.jpg" />
      </uib-slide>
    </uib-carousel>
</div>


My 100% width input text box losing out border and misaligned from other contents.

Today I was having issues with the text box not aligning with other elements pixel perfectly.


The border on the right hand side is losing out. To be precise, I am exactly 2 pixel out.


The reason for this is because the input text box has a border of 1 pixel, so left + right = 2 pixel. I tried to look up on stackoverflow but it didn't went well. The proper way to do it is by setting the css box-sizing property to border-box.

By using a border box, "The width and height properties (and min/max properties) includes content, padding and border, but not the margin". Which is exactly what I needed as I want the 1 pixel border included in the width. My css now looks like this.

.input-full {
 width: 100%;
 box-sizing: border-box;
}


And now by input text box and bottons are happily aligned together.

Selectively prevent git push when using multiple git remote

I have the following git remote in my local.

$ git remote -v
dw      https://username@bitbucket.org/demandware/build-suite.git (fetch)
dw      https://username@bitbucket.org/demandware/build-suite.git (push)
origin  https://username@bitbucket.org/apgco/build-suite.git (fetch)
origin  https://username@bitbucket.org/apgco/build-suite.git (push)

By default, a git pull or push will connect to both remotes. I want to fetch from muliple remotes but only push to origin.

I override the push location by running this.

$ git remote set-url --push dw no-push

Now a git push will not push to dw.

$ git remote set-url --push dw no-push
dw      https://username@bitbucket.org/demandware/build-suite.git (fetch)
dw      no-push (push)
origin  https://username@bitbucket.org/apgco/build-suite.git (fetch)
origin  https://username@bitbucket.org/apgco/build-suite.git (push)

Further information from the git remote commands.

DemandWare UX Studio could not open the protocol handler port.


Today I am trying to setup Eclipse and Demandware on my local machine and I am getting the following DemandWare UX Studio could not open the protocol handler port error when I am trying to run in debug mode.


It turns out that UX Studio does not allow running of multiple Eclipse instances. And the issue is with the setup of my Eclipse. The Eclipse Application Configuration should not be there. After the removal of it and everything is working again.


nopCommerce - Missing configure button in plugin

Scenario

I am building a new nopCommerce plugin that will handle the CyberSource Order Status Notification. Everything went smoothly and got all my code compiled. After the installation of the plugins, I found there is a missing configure button that would normally be there.


Solution

I revisited the source code of my other plugins, it compiles fine and didn't spot any obvious error. I went over to some of my notes and wiki then I found I missed a very little step.

public class CyberSourceOSNPlugin : BasePlugin, IMiscPlugin

I created the plugin class file but left out the bit where I have to implement an interface of IPlugin. After I implemented the interface, it is working fine again.