Scope
We are going to build some apps in Android and iOS, as I have never done that before, I am going to build a really simple Hello World app that would introduce me to the world of apps.
Prerequsite
Installations
There are quite a few things to prepare before we can even say hello to the world.- Install NodeJs
- Install PhoneGap
- Install Cordava CLI Command Line Interface
- Install SDK for each platform
- Android
- Install Java SE JDK
- Install Android SDK
- iOS
IDE
There are many options for choice of IDEs. Popular ones are as follow.
Mobile Frameworks
Cordova
Create
Firstly we will create the app by using a command line. This will be compatible for Android and iOS by adding the platforms to the app.
$ cordova create HelloWorld com.helloworld HelloWorld
$ cd HelloWorld
$ cordova platform add android
Setup
Setup Environment variable for ANDROID_HOME. This can be found by opening the Android SDK Manager.

Therefore, we will setup as follow.

Build
We will use our Command Line Interface to build our app as follow.
$ cd HelloWorld
$ cordova build android
If you are a little unlucky, you might run into error like this. Error: Please install Android target: "android-22".

This indicates we are targeting an incorrect version of android. We need to change our target in both places.
HelloWorld/platforms/android/project.properties
HelloWorld/platforms/android/CordovaLib/project.properties
It will look like this if built successfully.

Test
As part of the Android SDK installation, it comes with the Android Virtual Device (AVD) Manager.
Choose Device Definition and Click Create AVD.

We will launch the AVD that we just created, and deploy our app to the emulator by running this command.
If everything ran smoothly, by default it should load up the Cordova Device Ready page from our /HelloWorld/www/index.html

This time, we have a default page from the Ionic framework.

We are going to create some simple notifications. There are infinite ways of doing it. The most simplist form will be this.
However, we have not much control with the default alerts. The next step for me is to utilize some available plugins to do a bit more customizations. eg. https://github.com/apache/cordova-plugin-dialogs
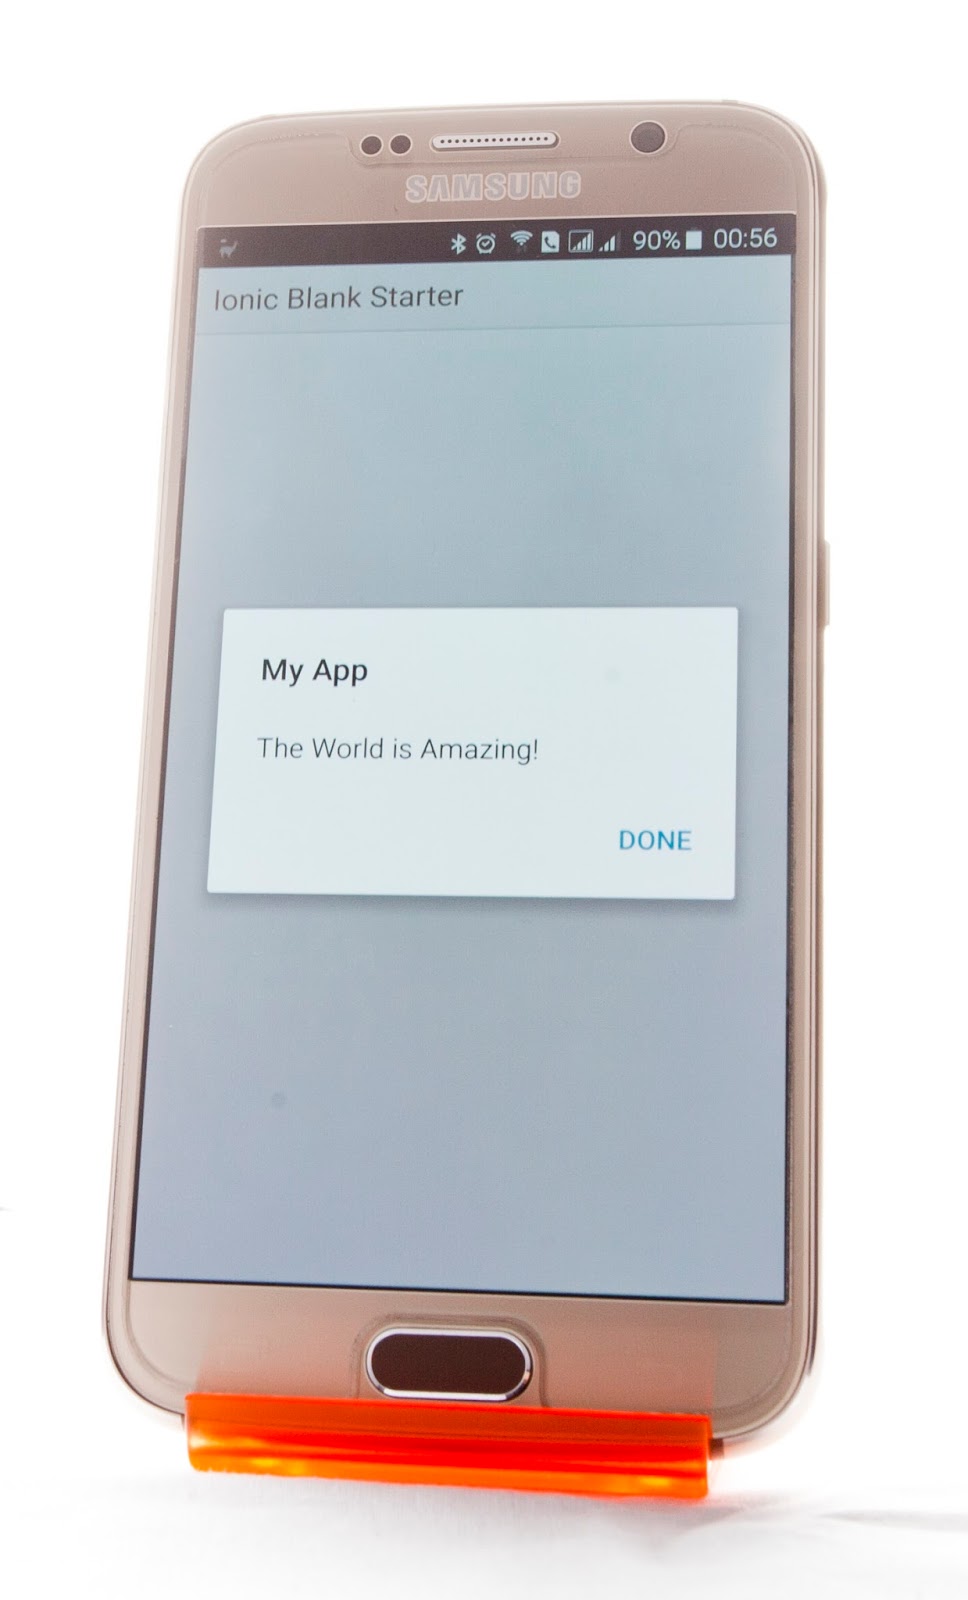
The first message pops up is 'The World is Amazing!', then a callback function is invoked when the message is dismissed, so the alert message 'Hello World' will pop up.


Choose Device Definition and Click Create AVD.

We will launch the AVD that we just created, and deploy our app to the emulator by running this command.
$ cordova run android
If everything ran smoothly, by default it should load up the Cordova Device Ready page from our /HelloWorld/www/index.html

Hello World
Before we begin, we will need to pick a mobile framework to work with. I have chosen the Ionic Framework.
Firstly, we will install the packages.
Then, we will scaffold our site.
Similar to our Cordova commands, we can build and run our apps in Ionic commands.
Firstly, we will install the packages.
$ npm install -g cordova ionic
Then, we will scaffold our site.
$ ionic start HelloIonic blank
Similar to our Cordova commands, we can build and run our apps in Ionic commands.
$ cd HelloIonic
$ ionic platform add android
$ ionic build android
$ ionic run android
This time, we have a default page from the Ionic framework.

We are going to create some simple notifications. There are infinite ways of doing it. The most simplist form will be this.
alert('Hello World!');
However, we have not much control with the default alerts. The next step for me is to utilize some available plugins to do a bit more customizations. eg. https://github.com/apache/cordova-plugin-dialogs
function alertCallBack() {
 alert('Hello World');
}

navigator.notification.alert(
 'The World is Amazing!',
 alertCallBack,
 'My App',
 'Done'
);
The first message pops up is 'The World is Amazing!', then a callback function is invoked when the message is dismissed, so the alert message 'Hello World' will pop up.


USB Device
We can run the app not just on emulator, but a USB connected device as well.
Firstly, we will need to setup our device for development.
For my Samsung device, I needed the extra Windows drivers which I was hardly able to find from within the Samsung support page, but with a bit of googling, I found the hidden gem in their developer site.

After installing the drivers, we can connect our device to the computer via USB, we can test if our device is available for debugging purpose by running an adb (Android Debug Bridge) command.

The device is now visible to us and we are just one step away. On our device, we need to authorize our computer for USB debugging. After connecting our device to the computer, a similar screen should popup on your device.

We will run our adb command again. This should now say device after it is authorized.

With our Ionic commands, we can now explicitly specify to run our app in our device.
It will install and run the app in our USB attached device.


Firstly, we will need to setup our device for development.
For my Samsung device, I needed the extra Windows drivers which I was hardly able to find from within the Samsung support page, but with a bit of googling, I found the hidden gem in their developer site.

After installing the drivers, we can connect our device to the computer via USB, we can test if our device is available for debugging purpose by running an adb (Android Debug Bridge) command.
$ <android-sdk>/adb.exe devices

The device is now visible to us and we are just one step away. On our device, we need to authorize our computer for USB debugging. After connecting our device to the computer, a similar screen should popup on your device.

We will run our adb command again. This should now say device after it is authorized.

With our Ionic commands, we can now explicitly specify to run our app in our device.
$ Ionic run --device
It will install and run the app in our USB attached device.

Conclusion
How about iOS? It happens that iOS can only be done in OS X and I don't have any. I tried to add the iOS platform in Cordova with my Microsoft machine, and I got the error as follow. There are some hackintosh way that I could get around the Apple issue, but I will leave that for another project next time.

Took me awhile to get there, but it is all worth it. As a web developer, I am now able to use my existing web knowledge to start building multi-platform mobile apps.

Took me awhile to get there, but it is all worth it. As a web developer, I am now able to use my existing web knowledge to start building multi-platform mobile apps.