Scope
Tealium is a powerful tag management tool. Adding a tag is easy and straightforward, but things get a little complicated when I was trying to convert a tag to share between sites in our multi-tenant environment.
I found some documentations but not examples on this topic, so I decided to make one and hope to serve well for those who maybe in need.
Steps
Tag
The simplest way to add a tag is by going to the Tags tab and click Add Tag. In this example, we are adding a Rakuten Linkshare tag with an example merchant id 12345.


Data Layer
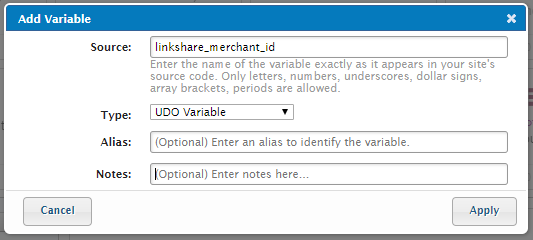
Defining a variable in data layer is useful when we want to pass dynamic data to a tag.

Extension
In an extension, we can apply technical and business rule to assign different values to a variable, so we can share the same tag between multiple-tenant sites.
Instead of hard coding the merchant id 12345, I am now able to setup a rule to assign different ids to different sites base on different rules.
Instead of hard coding the merchant id 12345, I am now able to setup a rule to assign different ids to different sites base on different rules.

Data Mapping
Finally, we can map this variable to our tag. The destination should be the javascript query string variable name depending on the technical spec of the image tag.
<img src="http://track.linksynergy.com/ep?mid=xxxx&ord=xx&skulist=xxxx&qlist=xxx&amtlist=xxxx&cur=xxx&namelist=xxxxx">
For rakuten, it is the mid that we need.

Load Rules
Optionally, we can conditionally load the tag depending on business/technical requirements. For the rakuten tag, we only want to fire on the order confirmation page, so we will create a rule for the definition of order confirmation page.


Final Tag
Finally, the tag will look like this. Noticed now we can leave the merchant id empty, and the Tealium will do the magic by using the Data Layer and Extensions.

